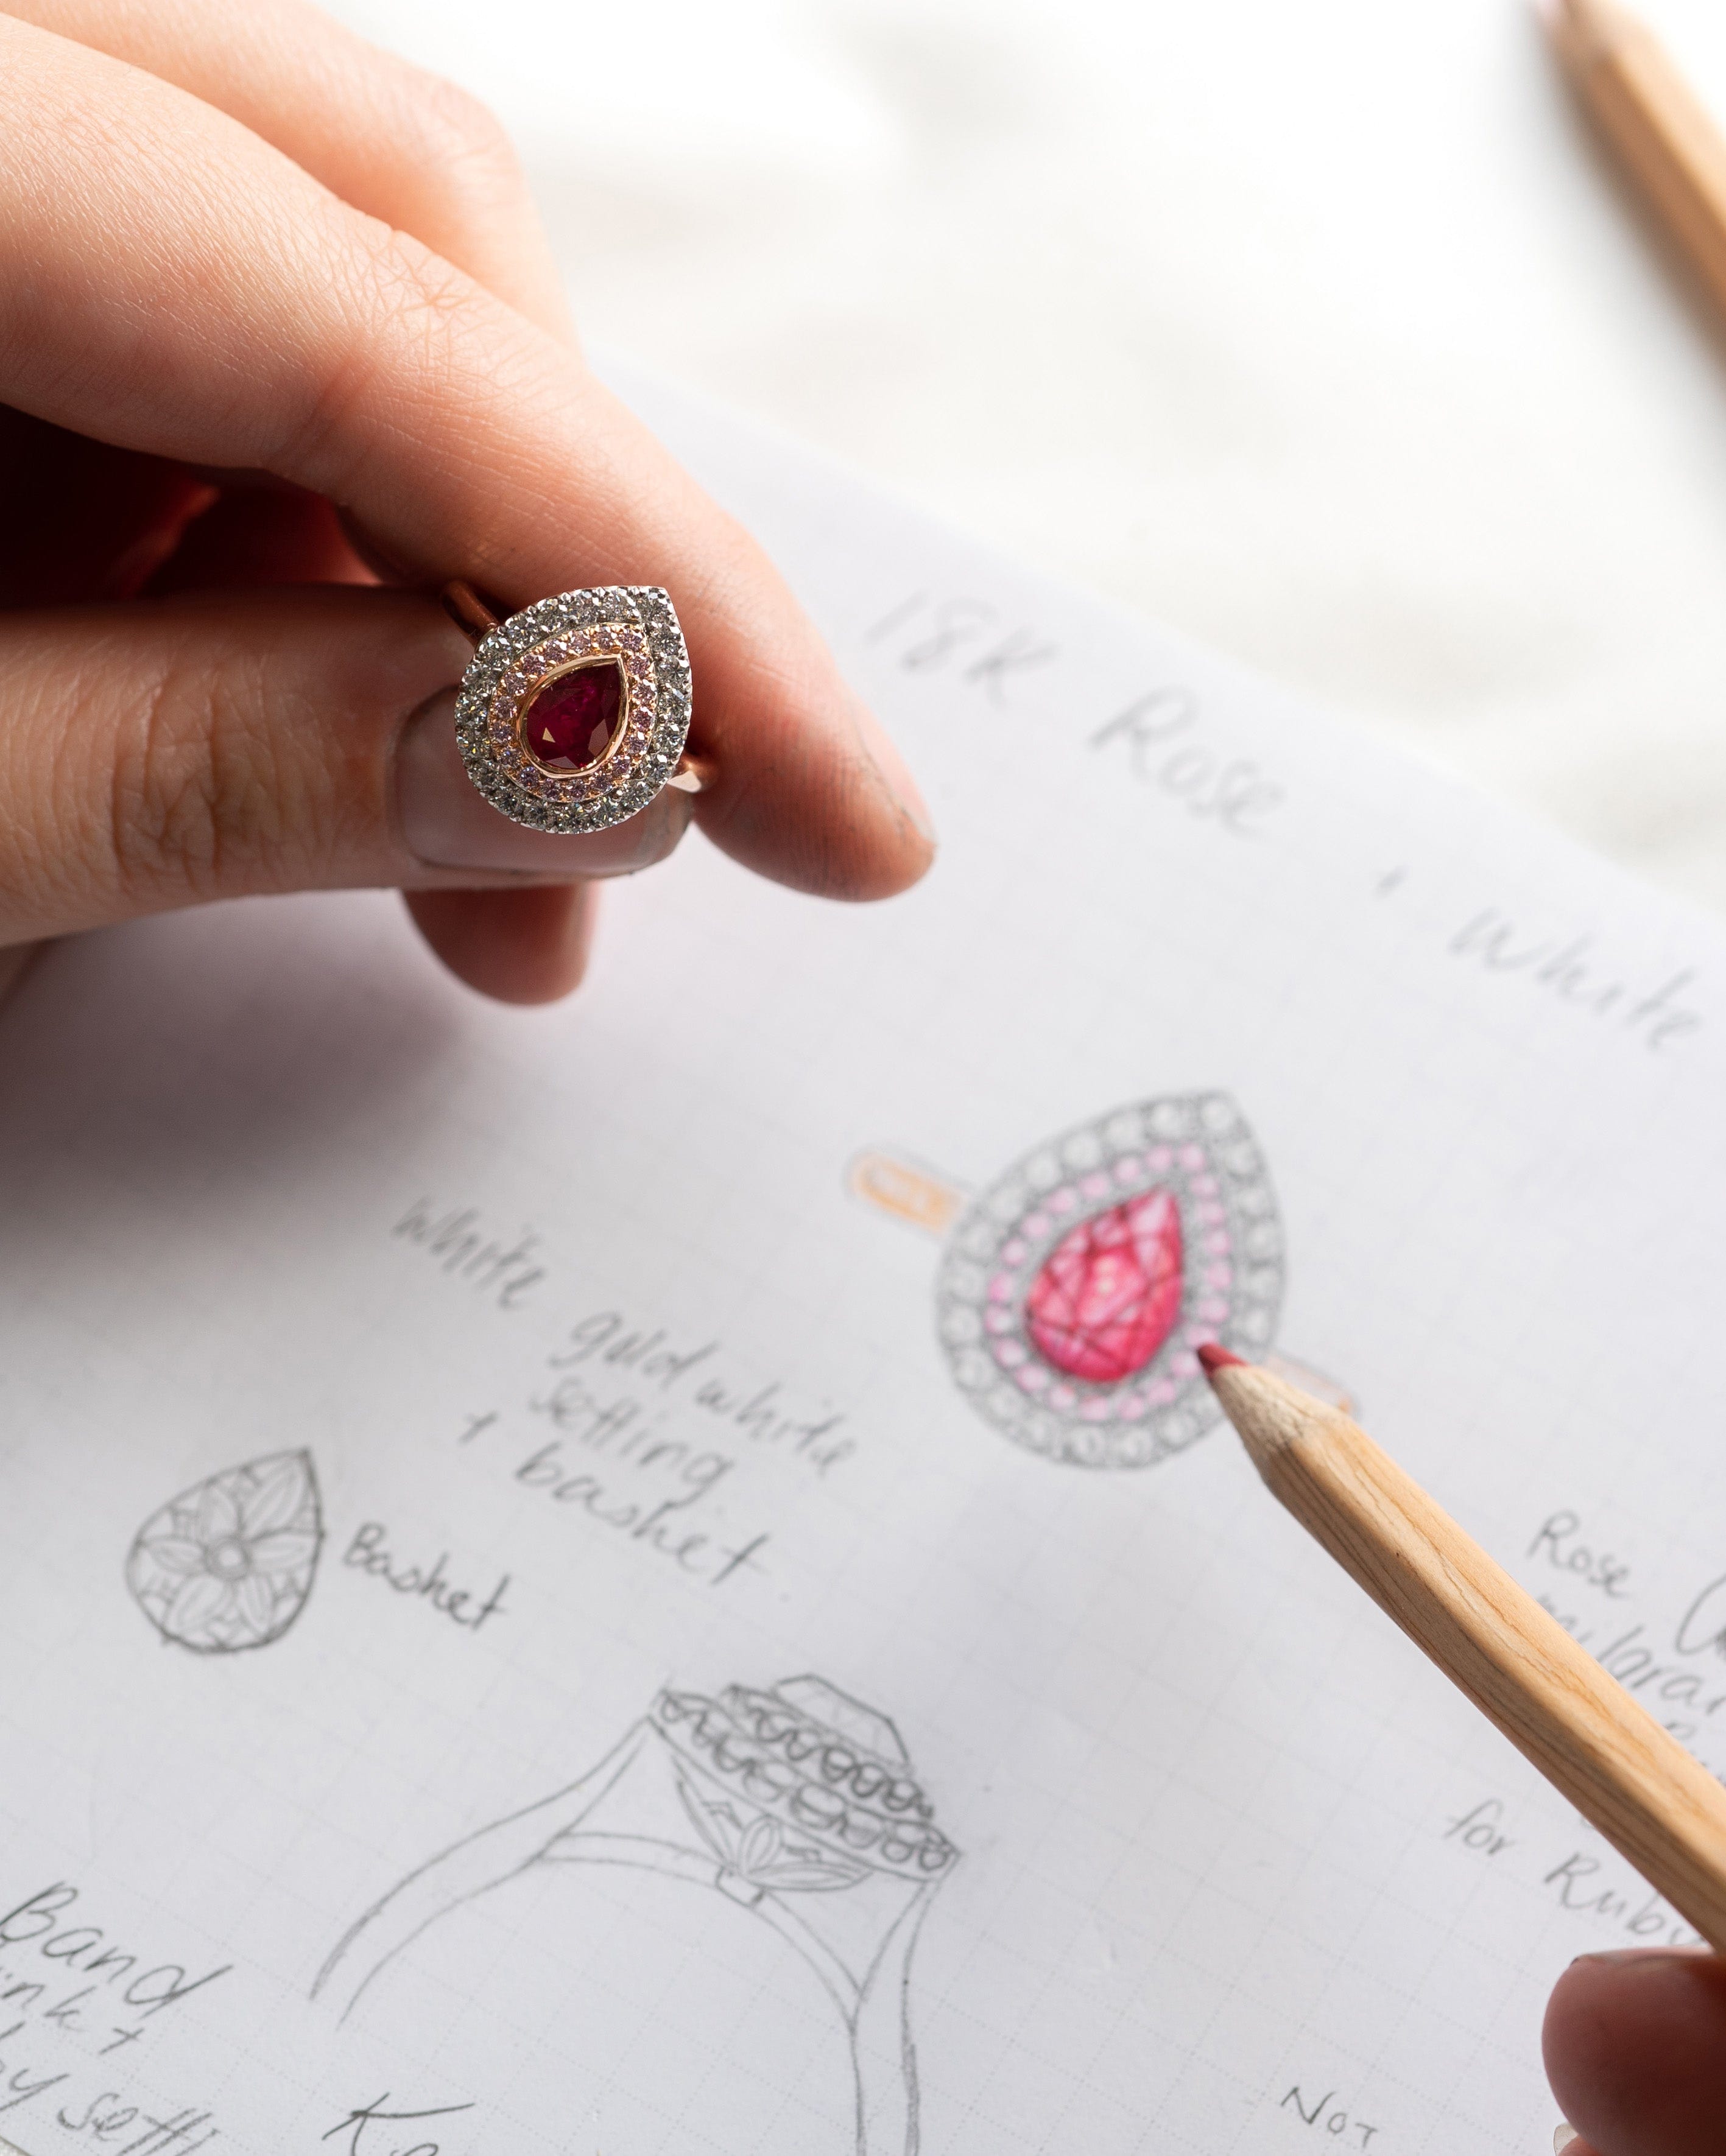

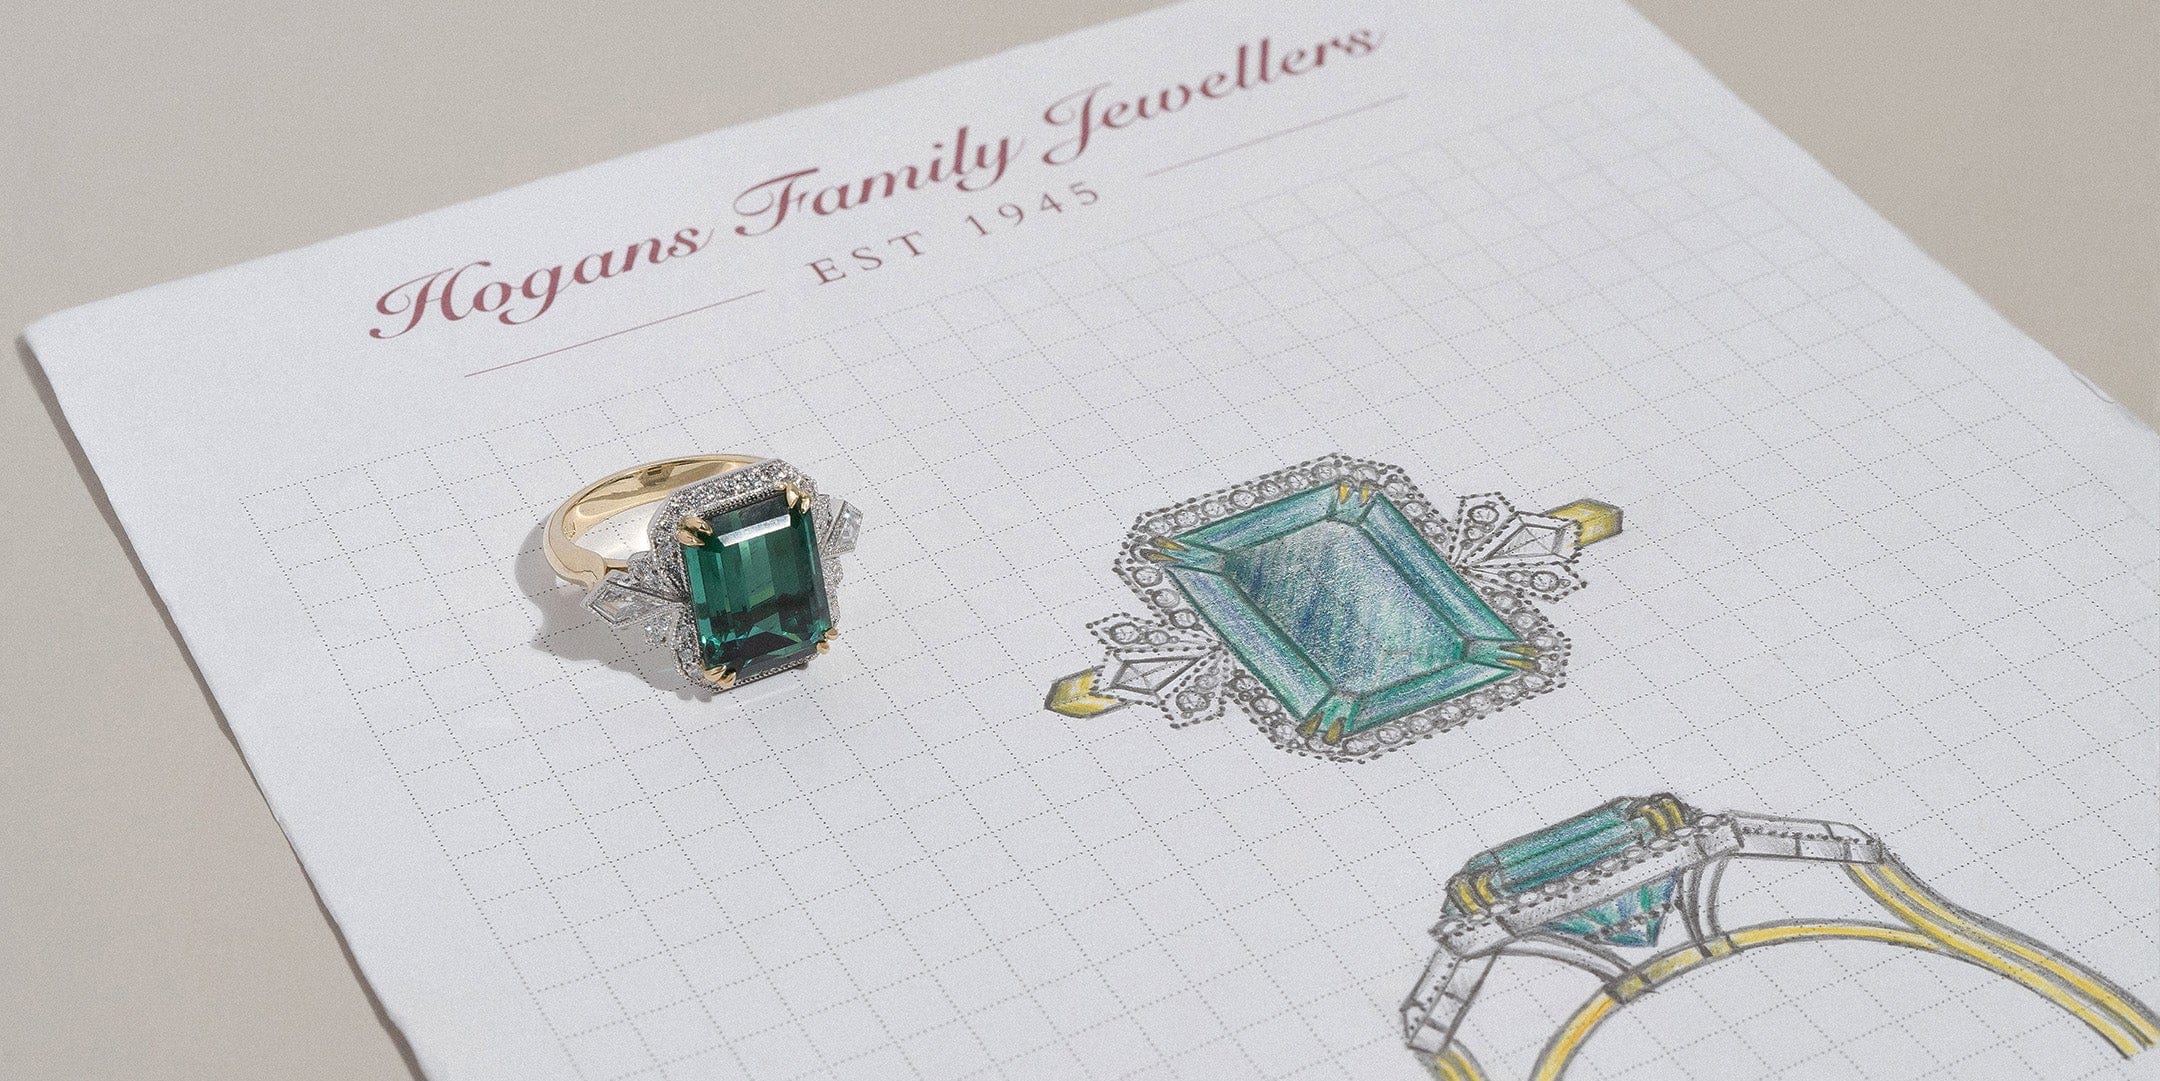

This month the spotlight is on the latest bespoke ring designed, assembled, and crafted in the Hogans workshop. As a proud platinum-plus sponsor of this year’s Toowoomba LifeFlight Gala, our team had the pleasure of designing and crafting this piece that would be available for attendees to vie for in the event’s annual balloon pop. The lucky winner, Sue Giacomantonio, is the now proud owner of this one-of-a-kind piece. To accompany the ring, our very own award-winning jewellery designer, Keelie Sander, illustrated and hand-painted a gouache watercolour artwork of the piece.
This stunning piece was thoughtfully curated with inspirations from the art-deco period of the early 1900s and illustrates the beauty of simplicity and straight-line features of this bygone design era. Today, art deco features are still used in many aspects of architecture, fashion and design and are significant to many design professionals as a style of timeless elegance. This bespoke ring champions an incredible forest green tourmaline in recognition of the colour palette and event theme chosen for this year’s LifeFlight Gala. Together with the Toowoomba LifeFlight team, we celebrated this iconic design period by designing and crafting a masterpiece to be cherished for future generations.
Crafted in 18k yellow and white gold, featuring elements reminiscent of the Art-Deco period, this piece champions a vibrant 6ct emerald cut forest green-hued tourmaline gemstone. Accompanying the centrepiece is a tri-cluster of kite and round brilliant cut diamonds, finished with a halo of petite round brilliant cut diamonds set in milgrain beading. Today, we speak to the members of the Hogans team that were involved in the design and crafting process to dive deeper into the meaning behind the ring, along with the techniques used and challenges that they encountered when assembling and setting it.

 The Designer: Lachy
Q: Let's start by exploring the design inspiration for the ring. What was your primary inspiration for the design of this bespoke ring?
A: When initially meeting with the LifeFlight team, we discussed the gala’s theming. The colour palette included hues of forest green and gold and themes of the art-deco period, so all of these factors definitely played on my mind when sourcing design inspiration and making selections for the gemstones and precious metal colours. I also had an abstract idea to feature kite-shaped diamonds somewhere in the design to resemble the propellors of the LifeFlight helicopter.


Q: How did the Art Deco period influence the overall aesthetic of this piece?
A: The branding used by the LifeFlight committee had details reminiscent of the Art Deco period. I picked up on that and wanted to create a finished piece that tied in with all of the themes for this year's LifeFlight gala.
Q: Were you given any direction with the design, or did you have creative freedom?
A: The LifeFlight team fully entrusted us to design and craft something that showcased our craftsmanship, so we were very appreciative of the creative freedom they gave us. It’s a big responsibility to produce such a special piece and given it would be presented at such a highly regarded event, the design had to be just right. I am very particular with details and was confident in getting a great result but that would require the freedom to do so, so thank you LifeFlight team!
Q: Can you walk us through the design process, from the initial concept to the final design?
A: The design process can drag out a little with a piece like this, as I generally like to spend a little bit of time each day putting some ideas and rough sketches on paper, adding and subtracting details and letting the design mature over time until I am happy with the result. This one was no different.

Q: Approximately how long did it take you to design the piece in full?
A: This design process was a little different to our standard process as we wanted to select the centre stone and take the design from there. It took approximately two weeks to source the right centre gemstone as well as the accompanying kite-shaped diamonds. As the colour palette of this year’s gala incorporated deep green hues and yellows, we wanted to ensure the colour of the gemstone matched. After hand-selecting three different gemstones from our suppliers, we landed on the beautiful 6ct forest-green tourmaline because of its perfect colour and well-proportioned cut. Once the centre stone was selected, we looked to the event theming which was heavily inspired by the art-deco period. It only took a week or so of playing around with different design ideas and elements to eventually produce the final design. From here, we sourced the remaining smaller diamonds that were required for the halo and commenced the manufacturing process which took approximately four weeks.
Q: What are you most proud of with this design?
A: The overall finish of the ring is incredible. Being able to achieve the right proportional balance with a larger gemstone is also a challenge from a design perspective so I am incredibly pleased with how the design has come together to achieve a seamless aesthetic. Working with a larger semi-precious gemstone like tourmaline as well as kite-shaped diamonds also poses a challenge as both are quite fragile to work with and require the utmost care to ensure the stones don’t get damaged. I’m incredibly proud of each jeweller’s contribution and attention to detail when carrying out their component. This piece really is a showcase of each individual’s high level of skill and craftsmanship.
The CAD Designer: Nolan
Q: CAD design is an intricate step in the jewellery-making process, and this piece is absolutely no exception with the amount of detail that has been incorporated. What were the biggest challenges when it came to CAD designing the ring?
A: When using CAD software, it can be difficult to line up all the components when they are so intricate like those featured in this piece. One of the biggest challenges I faced when CAD designing this ring was the inclusion of the kite stones. As kite-cut diamonds are quite an uncommon stone to incorporate into a piece they make for a challenging CAD process. Along with this, the hidden detail of the beading under the setting caused a bit of a struggle. Hidden details are always fun to do and give the jewellery more personality, but do require some patience when designing on CAD.

Q: How did you ensure that the jewellery designer’s vision was accurately transformed into a CAD model?
A: I suppose the beauty of CAD is, it’s so specific so you can accurately see how the components will come together and focus on turning the jewellers artistic design into a real piece. The designs are always quite accurate, but through CAD the real precision and construction aspect of the piece comes into play, therefore it is a process of combining design and accuracy into the beautiful final piece. In my opinion, CAD designing takes the jewellery designer's dream and is able to technically transform it into a reality.
The Jeweller, Assembler and Setter: Tim
Q: What was the biggest challenge for you as the jeweller who assembled these intricate components?
A: Assembling this piece was like no other I had previously worked on. However, I did run into one little issue with the casted piece having to be modified to properly accommodate for the depth of the tourmaline centre stone.
Q: How did you ensure the structural integrity of the ring, especially given its intricate design?
A: We always make our pieces to last and with the utmost quality. Therefore, I just had to make sure that effective supporting structures were incorporated into the final piece, and further ensure that all the joints had good integrity and were not going to give out. In this essence, the piece was pretty much similar to every other previous piece I have worked on regarding structural integrity.

Q: Setting is a very steady and precise task. What was the biggest challenge you had when it came to setting the stones? Also, can you share any special considerations taken when working with such a vibrant and large tourmaline?
A: Although there was the addition of the uncommon kite shaped diamonds and the large tourmaline gemstone centre stone, I didn’t have many challenges. Yes, tourmaline is a softer gemstone and therefore there was always going to be a bit of delicacy when setting the centre stone. However, through using correct setting techniques that have been trialled and developed over time, I was confident in my ability to set these stones. The main consideration and thing to watch out for when setting these delicate diamond cuts and softer gemstones is ensuring there is no large amounts of stress on certain points of the stones.
Q: Approximately how long did it take you to set the ring?
A: The setting process as a whole would’ve taken all up a complete days’ worth of work. The large tourmaline centre stone in itself took multiple hours to delicately and precisely set into the ring.
The Painter: Keelie
Q: What was it like to paint such an intricate piece of jewellery?
A: The team at Hogans always goes above and beyond in their work. Our team works tirelessly to create stunning heirlooms and this piece is no exception. The LifeFlight Ring carries grandeur but also has the finer, more intricate details that have become a signature trait of a Hogans piece. Painting this ring was not only a tribute to the piece and the stones but to the team behind the work.
I am always astounded that anyone would like to have my art displayed in their home, but to be able to paint such an amazing piece for a great cause; needless to say, I was honoured. Painting gemstones and rendering jewellery is one of my favourite parts of my job and painting this piece was a fantastic opportunity to showcase my skills and love of my art that few people have seen.

Q: Were there any struggles you encountered when trying to capture all the fine details of this exquisite piece?
A: The essence of diamonds and the fire within I feel are the hardest part of any piece that I have painted. Finding the balance between the tones within the stone is a huge task. Hogans only use the best diamonds which are of high quality, and near colourless. So, painting something that is clear has been quite difficult for me. Diamonds have their own personality and hopefully my work has showcased the life of these stones. Painting diamonds and rendering gemstones is still something I am working on and as any other artist will tell you there's always more practice, more learning and more skills to perfect. Hopefully one day we can look back at this piece and see how far I have come as an artist.

Q: How do you ensure that the painting will be effective in showcasing the natural beauty of the gemstones and metals, can you share any specific techniques you use?
A: This piece was a mammoth task, not only because of all of the intricate details that our team had included but I needed to capture the mystical beauty of the 6ct Tourmaline.
When I begin any painting, I take my own reference photos outside in overcast light. Coloured, precious gemstones shine their brightest and truest colours in natural defused lighting. By completing the process, I can not only study the facets of the stone more closely, but the how light interacts with the stone’s surface and interior. I can inspect the back faceting of the stone and try to pinpoint where the life of the stone comes from and how it sparkles. This tourmaline had striking stripes of blue and teal running through the stone whilst in daylight and I really tried to capture this ethereal essence that not many people besides the wearer would see.
The Bespoke Framer: ArtShop Toowoomba
Q: The artwork is framed in fine Italian hand-leafed gold moulding decorated with a custom hand-painted gold bevel edge. What is the full process that goes into framing such a delicate piece of artwork, and what precautions are taken to ensure that no harm is done to the original painting?
A: Framing delicate artworks, especially one as exquisite as this, requires an informed and responsible approach. Our goal is to both enhance the artwork while also protecting it from environmental factors that can affect the artwork’s appearance and integrity over time. We also consider the medium of the work as it almost always guides us towards the frame’s aesthetic style. For example, classical subject matters often suit a traditionally styled gold or silver-leafed frame moulding, whereas contemporary pieces often look wonderful in less ornate frames.
ARTSHOP uses conservation-standard practices to handle and house the piece. This includes cotton gloves and cotton-covered workbenches to provide a clean, soft surface. We also use controlled compressed air in our climate-controlled workshop to ensure the framing components are free from dust and debris. During final assembly, we take care that the artwork is secure within the frame, with all elements aligned perfectly and free from imperfections. Strict protocols are followed for the storage of artworks in our workshop to prevent any damage. Each step is crucial for maintaining the artwork’s integrity and preserving its beauty and value. Our careful handling, precise craftsmanship, and attention to detail ensure that the final framed environment is both a protective enclosure and a work of art in itself.


Q: Do you use specialised materials in your frames or glass to ensure the artwork’s preservation?
A: Absolutely yes. We use the highest quality materials to ensure the presentation and preservation of each artwork. Archival-quality backing and mat board materials are crucial for preventing movement and deterioration of the work once it is framed. ARTSHOP’s recommended matting is made of 100% cotton fibres that are naturally pH-neutral, providing a safe and stable environment for the artwork. Additionally, we use Artcare™ Archival Foamboard, which is renowned for its conservation properties and structural integrity. This foamboard incorporates patented pollutant-absorbing technology to protect against harmful environmental factors. For this particular piece, we chose UltraVue® UV70 Glass. This exceptional glass offers clear colour transmission and a virtually invisible, anti-reflective surface, ensuring that the delicate, intricate details of the artwork are displayed with incredible clarity and brilliance.
Q: Approximately how long did it take to frame this piece?
A: Framing an artwork involves a multi-step process that goes far beyond simply assembling the frame. While the actual framing might take around 4 to 5 hours, this is just a part of the journey. We dedicate time to the artwork assessment phase, where we meticulously examine the piece to identify its unique properties and thereby understand its unique requirements, in order to sympathetically design the framing solution. Then there is time to order or manufacture the materials. Maintained throughout is careful conservation storage and handling protocols, ensuring the artwork remains in pristine condition while it is in our care and throughout the framing process. Each step reflects our commitment to the highest museum-grade standards, care, and expertise. At ARTSHOP, we bring this level of dedication to every customer, which is underscored by our membership in the Picture Framers Guild of Australia.

We are so incredibly proud of our team's contribution to this bespoke piece, and we invite you to view a special behind-the-scenes video of the piece being made.